Deploy smart contract using Foundry

Introduction
Foundry is a smart contract development framework written in Rust that enables developers to manage and compile contracts, run tests, deploy contracts, and interact with the network from the command line via solidity scripts.
Foundry consists of four main CLI tools that allow for fast and modular smart contract development, namely:
- Forge: You can deploy, test, and compile smart contracts using Forge.
- Cast: Cast has made it simple to interact with EVM smart contracts. This includes obtaining chain data, sending transactions, and other things.
- Anvil: Do you need to spin up a local node? Anvil is a local node environment offered by Foundry.
- Chisel: Fast, useful, and verbose solidity REPL.
In this guide, you will:
- Create a simple foundry project.
- Compile and test a sample smart contract using Foundry.
- Deploy smart contracts using Foundry to the Klaytn Baobab Network.
- Explore forking mainnet with cast and anvil.
Pre-requisites
To follow this tutorial, the following are the prerequisites:
- Code editor: a source-code editor such VS-Code.
- MetaMask: used to deploy the contracts, sign transactions and interact with the contracts.
- RPC Endpoint: you can get this from one of the supported endpoint providers.
- Test KLAY from Faucet: fund your account with sufficient KLAY.
- Install Rust and Foundry.
Setting Up Your Development Environment
To check if your foundry installation was successful, run the command below:
forge -V
Output

After successfully installing foundry, you now have access to the CLI tools (forge, cast, anvil, chisel) available in foundry. Let's set up a foundry project in the following steps:
Step 1: To start a new project, run the command below:
forge init foundry_example
Step 2: Navigate into your project folder.
cd foundry_examplels
After initializing a foundry project, your current directory should include:
- src: the default directory for your smart contracts.
- tests: the default directory for tests.
- foundry.toml: the default project configuration file.
- lib: the default directory for project dependencies.
- script: the default directory for solidity scripting files.
Sample smart contract
In this section, we will be using the sample counter contract in the initialized foundry project. The counter.sol file in the src/ folder should look like this:
// SPDX-License-Identifier: UNLICENSEDpragma solidity ^0.8.13;contract Counter { uint256 public number; function setNumber(uint256 newNumber) public { number = newNumber; } function increment() public { number++; }}
Code Walkthrough
This is your smart contract. Line 1 shows it uses the Solidity version 0.8.13 or greater. From lines 4-12, a smart contract Counter is created. This contract simply stores a new number using the setNumber function and increments it by calling the increment function.
Testing smart contract
Foundry allows us to write tests in solidity as opposed to writing tests in javascript in other smart contract development frameworks. In our initialized foundry project, the test/Counter.t.sol is an example of a test written in solidity. The code looks like this:
// SPDX-License-Identifier: UNLICENSEDpragma solidity ^0.8.13;import "forge-std/Test.sol";import "../src/Counter.sol";contract CounterTest is Test { Counter public counter; function setUp() public { counter = new Counter(); counter.setNumber(0); } function testIncrement() public { counter.increment(); assertEq(counter.number(), 1); } function testSetNumber(uint256 x) public { counter.setNumber(x); assertEq(counter.number(), x); }}
The code above shows you imported forge standard library and Counter.sol.
The tests above check the following:
- Is the number increasing?
- Is the number equal to the set number?
To check if your test works fine, run the following command:
forge test
Output

To learn more about writing tests, advanced testing, and other features, refer to Foundry's documentation.
Compiling your contracts
Compile your contract with this command:
forge build
Deploying your contracts
To deploy a contract using foundry, you must provide an RPC URL and a private key of the account that will deploy the contract. Take a look at the list of rpc-providers on Klaytn to find your rpc-url, and create an account using MetaMask.
Step 1: To deploy your contract to the Klaytn Baobab network, run the command below:
$ forge create --rpc-url <your_rpc_url> --private-key <your_private_key> src/Counter.sol:Counter
Example
forge create --rpc-url https://klaytn-baobab-rpc.allthatnode.com:8551/qtKkeUE8ZEPI2cs0OHloJ6seI4Wfy36N --private-key hhdhdhdhprivatekeyhdhdhdhud src/Counter.sol:Counter
WARNING: Replace the private key argument with your private key from MetaMask. Be very careful not to expose your private key.
Output

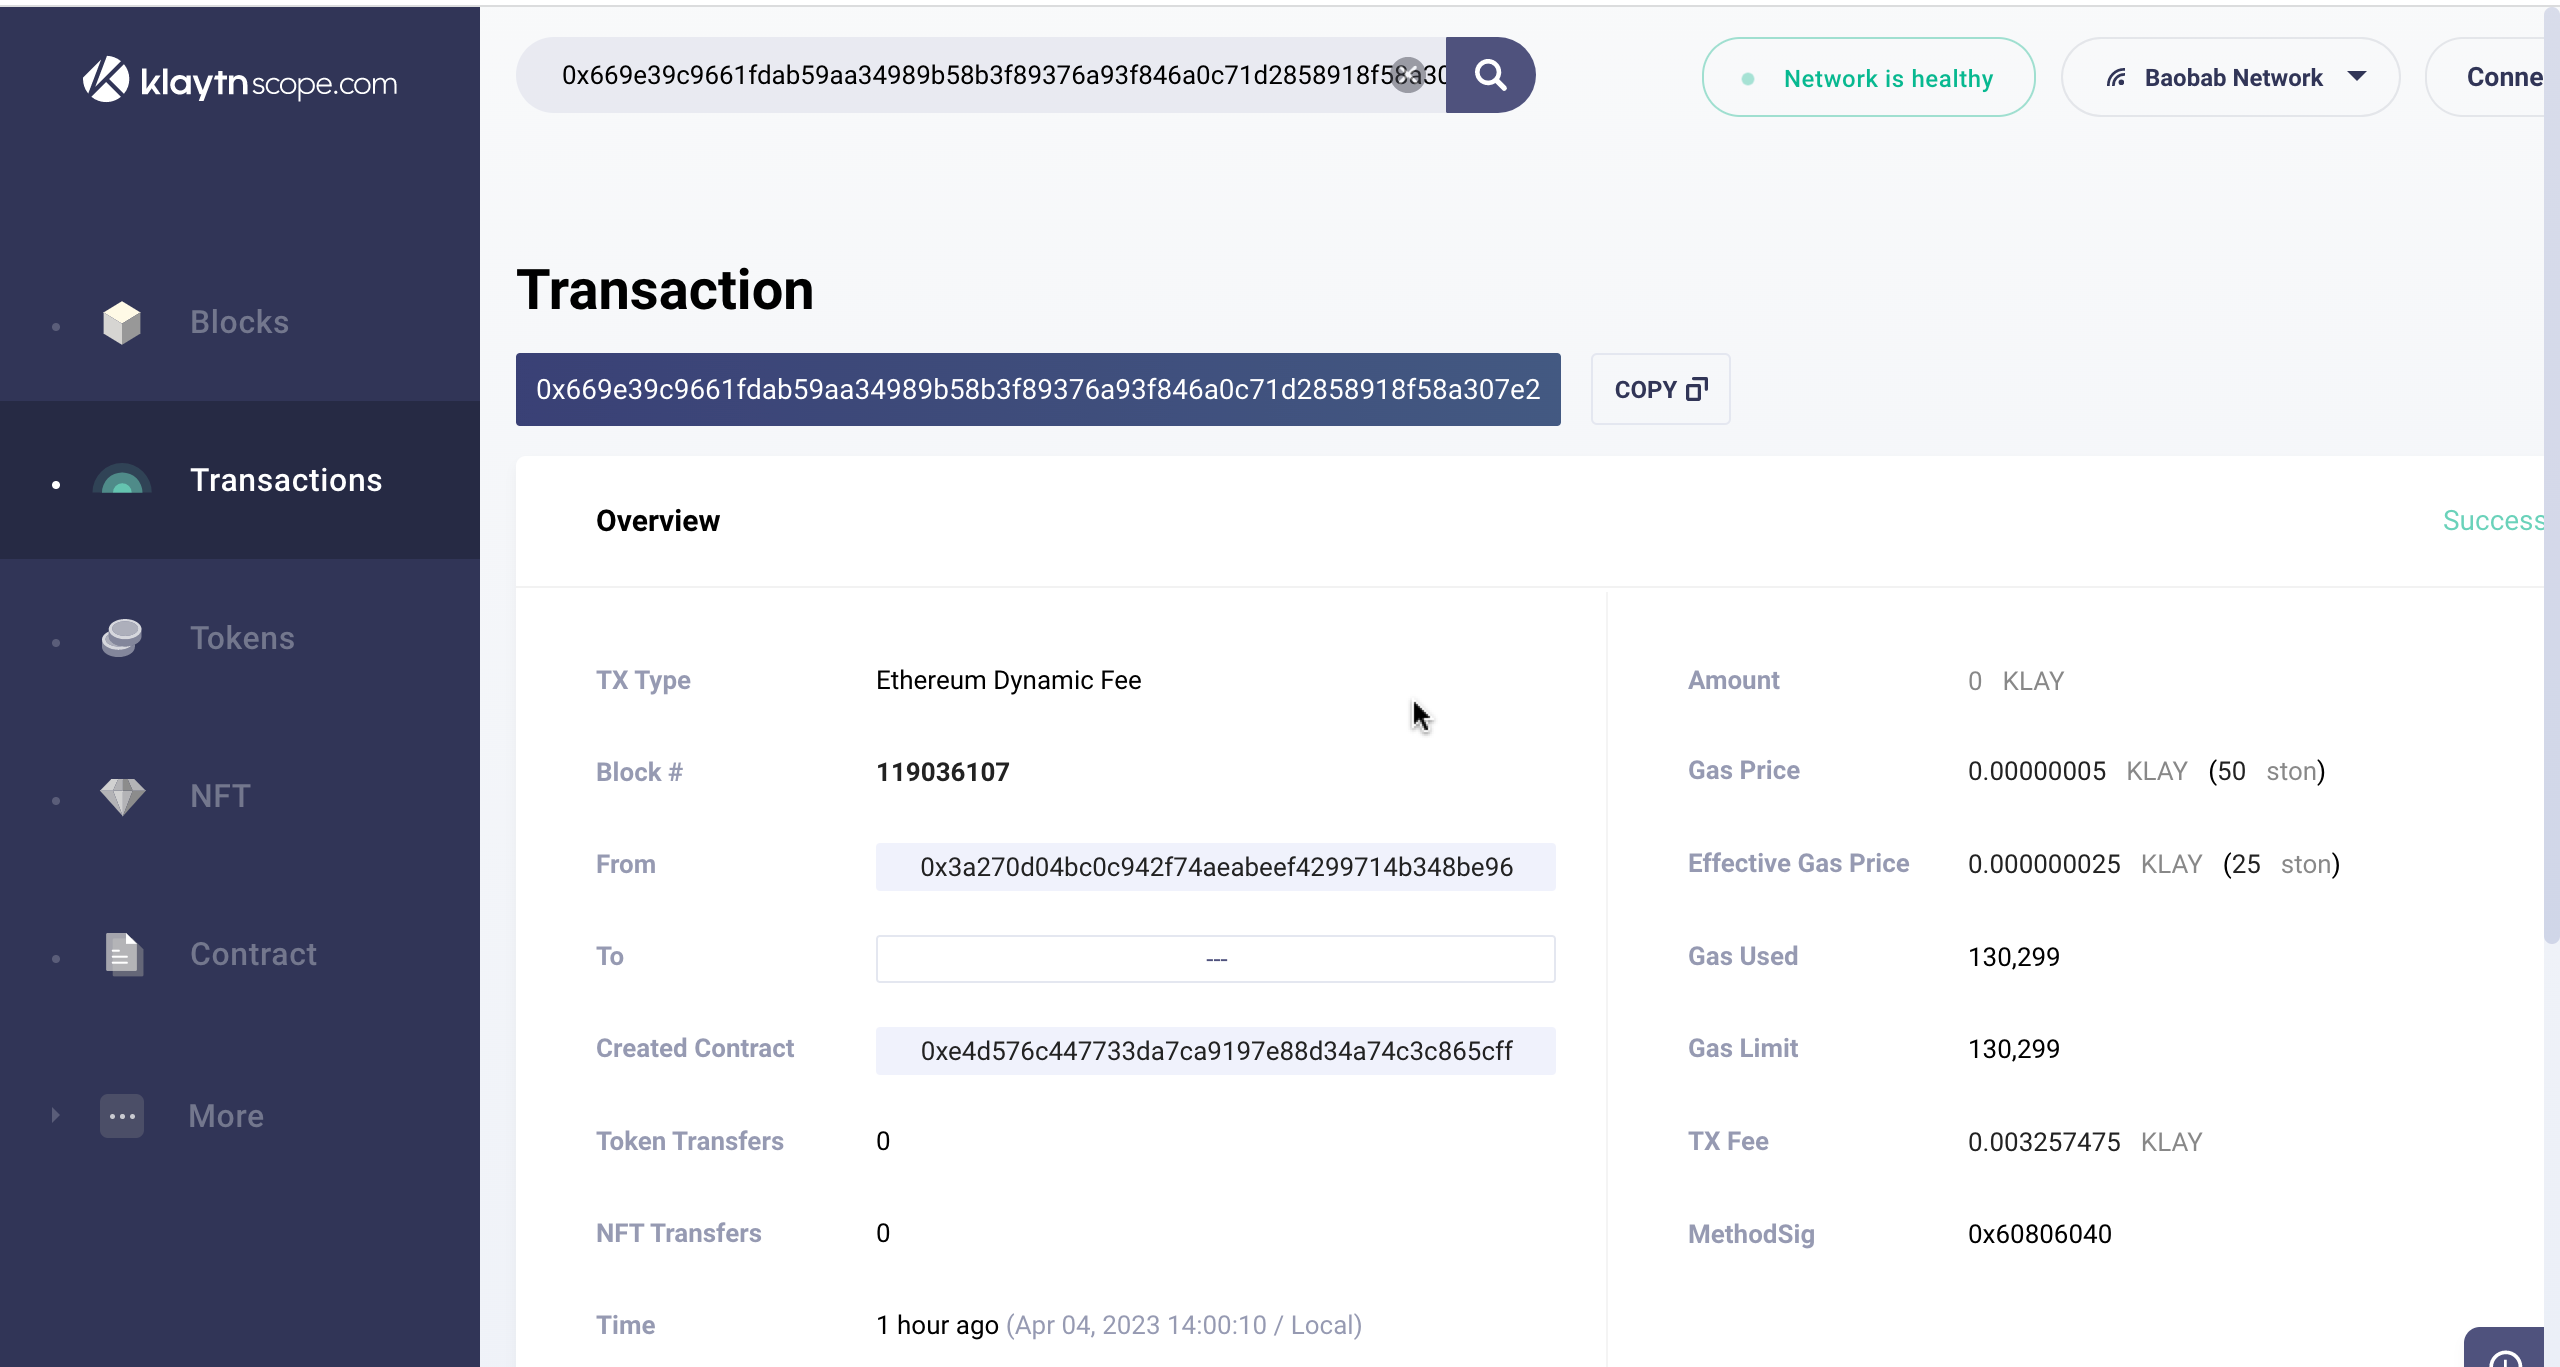
Step 2: Open Klaytnscope to check if the counter contract deployed successfully.
Step 3: Copy and paste the transaction hash in the search field and press Enter. You should see the recently deployed contract.

Interacting with the contract
After successfully deploying your smart contract, you will want to call and execute functions right. Let's get to interact with the deployed contracts on Klaytn Baobab Network using Cast. In this section, you will learn how to use the cast call to execute the read-only function and cast send to execute write functions.
A. cast call: To get the number stored in the contract, you will be calling the number function. Run the command below to see this in action.
cast call YOUR_CONTRACT_ADDRESS "number()" --rpc-url RPC-API-ENDPOINT-HERE
Example
cast call 0xe4d576c447733da7ca9197e88d34a74c3c865cff "number()" --rpc-url https://klaytn-baobab-rpc.allthatnode.com:8551/qtKkeUE8ZEPI2cs0OHloJ6seI4Wfy36N
Output

You should get this data in hexadecimal format:
0x0000000000000000000000000000000000000000000000000000000000000000
However to get your desired result, use cast to convert the above result. In this case, the data is a number, so you can convert it into base 10 to get the result 0:
cast --to-base 0x0000000000000000000000000000000000000000000000000000000000000000 10
Output

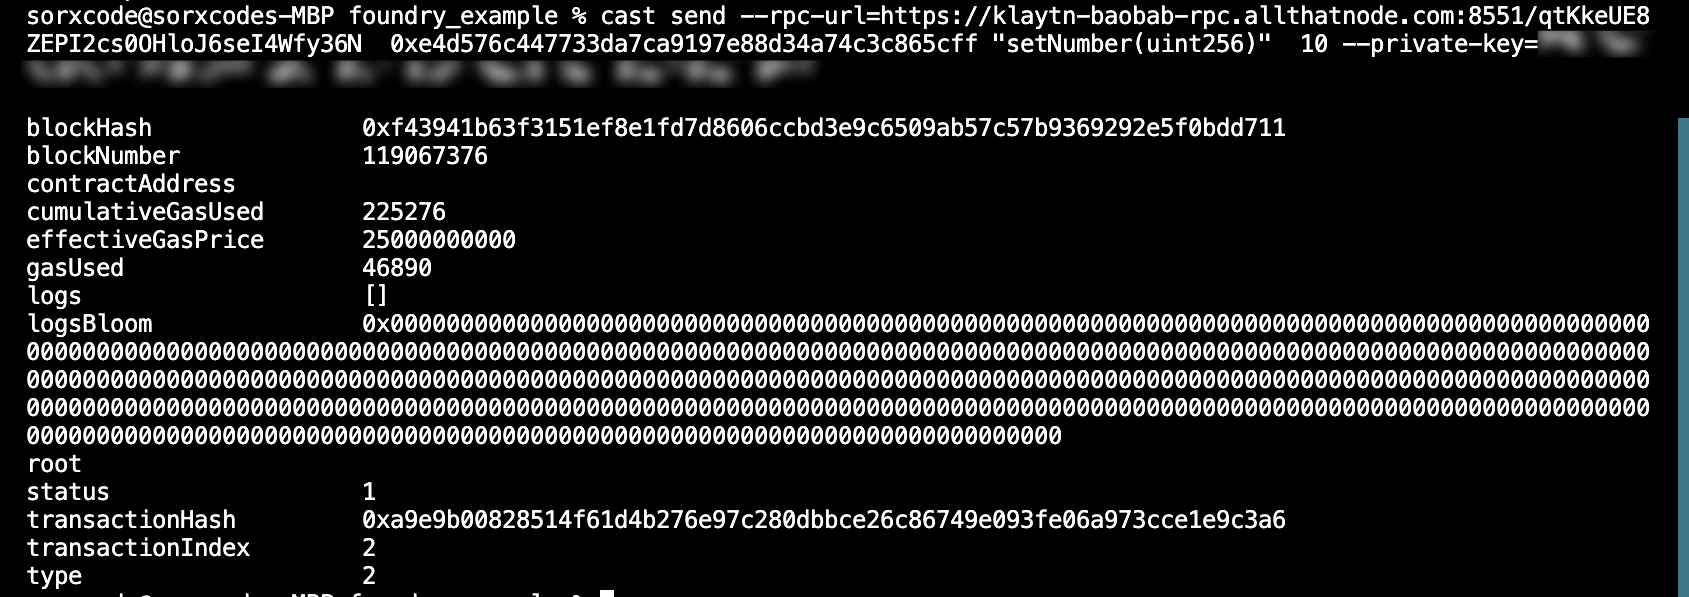
B. cast send: To sign and publish a transaction such as executing a setNumber function in the counter contract, run the command below:
cast send --rpc-url=<RPC-URL> <CONTRACT-ADDRESS> “setNumber(uint256)” arg --private-key=<PRIVATE-KEY>
Example
cast send --rpc-url=https://klaytn-baobab-rpc.allthatnode.com:8551/qtKkeUE8ZEPI2cs0OHloJ6seI4Wfy36N 0xe4d576c447733da7ca9197e88d34a74c3c865cff "setNumber(uint256)" 10 --private-key=<private key>
Output

Crosscheck Number
cast call 0xe4d576c447733da7ca9197e88d34a74c3c865cff "number()" --rpc-url https://klaytn-baobab-rpc.allthatnode.com:8551/qtKkeUE8ZEPI2cs0OHloJ6seI4Wfy36N
Output

You should get this data in hexadecimal format:
0x000000000000000000000000000000000000000000000000000000000000000a
However to get your desired result, use cast to convert the above result. In this case, the data is a number, so you can convert it into base 10 to get the result 10:
cast --to-base 0x000000000000000000000000000000000000000000000000000000000000000a 10
Output

Forking Mainnet with Cast and Anvil
Foundry allows us to fork the mainnet to a local development network (Anvil). Also, you can interact and test with contracts on a real network using Cast.
Getting Started
Now that you have your Foundry project up and running, you can fork the mainnet (cypress) by running the command below:
anvil --fork-url rpc-url
Example
anvil --fork-url https://archive-en.cypress.klaytn.net
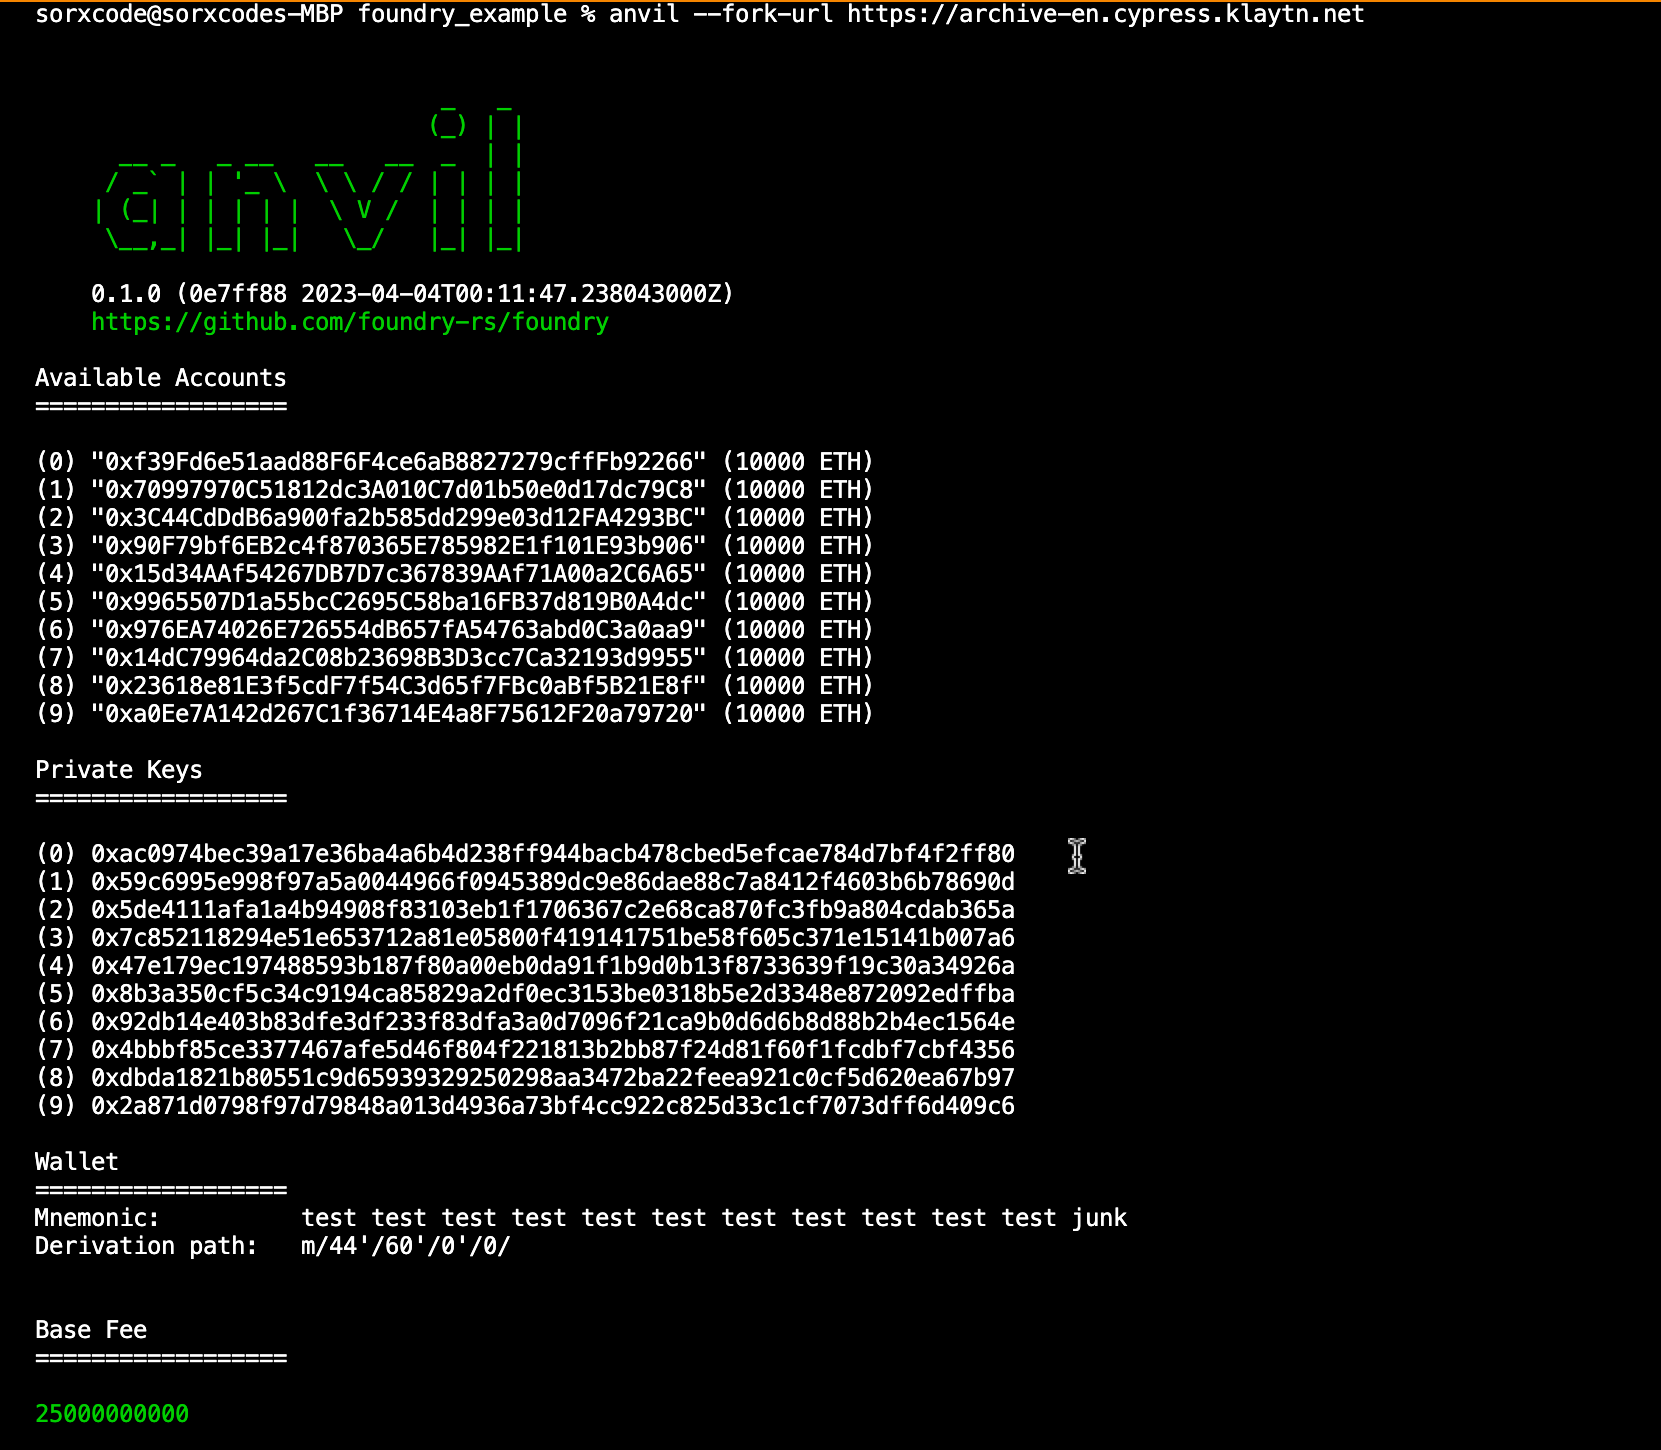
Output

After successfully running this command, your terminal looks like the above image. You'll have 10 accounts created with their public and private keys as well 10,000 prefunded tokens. The forked chain's RPC server is listening at 127.0.0.1:8545.
To verify you have forked the network, you can query the latest block number:
curl --data '{"method":"eth_blockNumber","params":[],"id":1,"jsonrpc":"2.0"}' -H "Content-Type: application/json" -X POST localhost:8545
You can convert the result from the task above using hex to decimal. You should get the latest block number from the time you forked the network. To verify this, cross-reference the block number on Klaytnscope.
Illustration
In this section, you will learn how to transfer oUSDC tokens from someone who holds oUSDC to an account created by Anvil (0x70997970C51812dc3A010C7d01b50e0d17dc79C8 - Bob)
Transferring oUSDC
Go to Klaytnscope and search for holders of oUSDC tokens (here). Let's pick a random account. In this example, we will be using 0x8e61241e0525bd45cfc43dd7ba0229b422545bca.
Let's export our contracts and accounts as environment variables:
export BOB=0x70997970C51812dc3A010C7d01b50e0d17dc79C8export oUSDC=0x754288077d0ff82af7a5317c7cb8c444d421d103export oUSDCHolder=0x8e61241e0525bd45cfc43dd7ba0229b422545bca
We can check Bob’s balance using cast call:
cast call $oUSDC \ "balanceOf(address)(uint256)" \ $BOB
Output

Similarly, we can also check our oUSDC holder’s balance using cast call:
cast call $oUSDC \ "balanceOf(address)(uint256)" \ $oUSDCHolder
Output

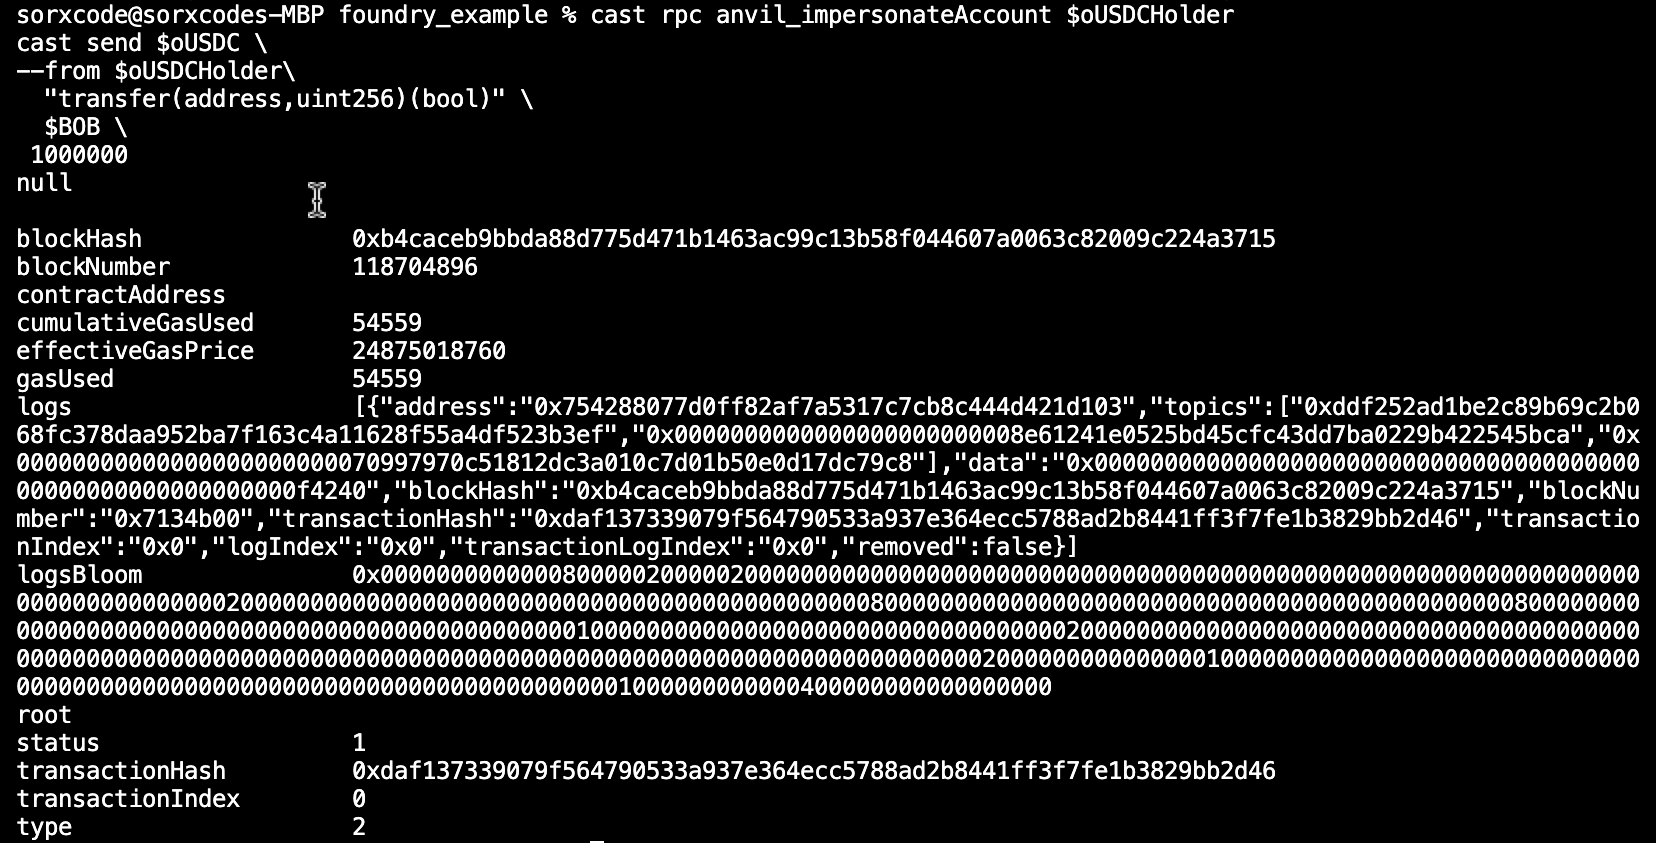
Let's transfer some tokens from the lucky user to Alice using cast send:
cast rpc anvil_impersonateAccount $oUSDCHolder cast send $oUSDC \--unlocked \--from $oUSDCHolder\ "transfer(address,uint256)(bool)" \ $BOB \ 1000000```0000
Output

Let's check that the transfer worked:
cast call $oUSDC \ "balanceOf(address)(uint256)" \ $BOB
Output

cast call $oUSDC \ "balanceOf(address)(uint256)" \ $oUSDCHolder
Output

For more in-depth guide on foundry, please refer to Foundry Docs. Also, you can find the full implementation of the code for this guide on GitHub.