LayerZero
Introduction
Over the past years in the blockchain space, data and tokens transfer between independent blockchain systems stands as a major challenge. However, with the advent of cross-chain messaging protocols like LayerZero, we have seen a major progress in connecting isolated systems together in a secure and decentralized manner. Now, tokens can be transferred from one ecosystem to another seamlessly in one transaction call without having to go through conversion in different exchanges.
By the end of this guide, you will have transferred tokens from one blockchain to another in a single transaction call using LayerZero Omnichain OFTV1 Contract.

Prerequisites
Before delving into the entire project, it's important to note that its finished form can be found in this repository: crosschain-oftv1-example. It uses Hardhat, so a prerequisite knowledge will be helpful for understanding how the repository works. Note that this tutorial will not include information on how to use Hardhat and will instead focus solely on the smart contracts. If you would like to follow along, the prerequisites are as follows:
- A fresh Hardhat project and knowledge of how to use Hardhat
- OpenZeppelin smart contracts installed as a dependency
- LayerZero smart contracts installed as a dependency
To install both dependencies, you can run:
npm install @openzeppelin/contracts @layerzerolabs/solidity-examples
LayerZero OmniChain Contract
LayerZero (L0) is an open-source protocol for building omini-chain, and interoperable applications. As it is, L0 provides two standard omnichain contracts for seamlessly transferring tokens across different chains, viz.
-
Omnichain Fungible Tokens (OFT)
1.1. Omnichain Fungible Tokens (OFT) v1: OFT standard exclusively supports EVM chains. Note this standard has a ProxyOFT.sol extension. Kindly use the ProxyOFT.sol extension when you want to turn an already deployed ERC20 into an OFT.
1.2. Omnichain Fungible Tokens (OFT) v2: OFT standard supports both EVM and non-EVM chains. Note this standard has a ProxyOFTV2.sol extension. Kindly use the ProxyOFTV2.sol extension when you want to turn an already deployed ERC20 into an OFTV2.
-
Omnichain Non Fungible Tokens
2.1. Omnichain Non Fungible Tokens (ONFT721): ONFT721 standard for cross-chain NFTs. Note this standard has a ProxyONFT721.sol extension. Kindly use the ProxyONFT721.sol extension when you want to turn an already deployed ERC721 into an ONFT721.
2.2. Omnichain Non Fungible Tokens (ONFT1155): ONFT1155 standard for cross-chain multi tokens. Note this standard has a ProxyONFT1155.sol extension. Kindly use the ProxyONFT1155.sol extension when you want to turn an already deployed ERC1155 into an ONFT1155.
Getting Started
In this guide, we would be focusing on the Omnichain Fungible Tokens (OFT) v1 which allows us to send tokens seamlessly across EVM chains. For that reason, we will be deploying the OFTv1 contract on both Klaytn Baobab (source chain) and Polygon Mumbai (destination chain) using Hardhat smart contract development environment.
Configuring Your Development Environment
Step 1: Configure Variables
A hardhat project can use configuration variables for user-specific values or for data that shouldn't be included in the code repository.
For example, to configure your PRIVATE_KEY do this in your hardhat.config.js file:
const PRIVATE_KEY = vars.get("PRIVATE_KEY");/** @type import('hardhat/config').HardhatUserConfig */ networks: { baobab: { url: `https://klaytn-baobab-rpc.allthatnode.com:8551`, accounts: [PRIVATE_KEY] }, mumbai: { url: `https://polygon-mumbai-pokt.nodies.app`, accounts: [PRIVATE_KEY] } }};
And then run the command below in your terminal to set the PRIVATE_KEY:
npx hardhat vars set PRIVATE_KEY
Next Enter the value of your PRIVATE_KEY

For more information on configuring variables, see hardhat configuration variable.
Step 2: Setup Hardhat Configs
Paste these configurations in your hardhat.config.js file:
require("@nomicfoundation/hardhat-toolbox");const PRIVATE_KEY = vars.get("PRIVATE_KEY");/** @type import('hardhat/config').HardhatUserConfig */module.exports = { solidity: { compilers: [ { version: "0.8.0", }, { version: "0.8.9", }, { version: "0.8.20", }, ], }, networks: { baobab: { url: `https://klaytn-baobab-rpc.allthatnode.com:8551`, accounts: [PRIVATE_KEY] }, mumbai: { url: `https://polygon-mumbai-pokt.nodies.app`, accounts: [PRIVATE_KEY] } }};
Now that we have our development environment all set, let's get into writing our cross-chain token smart contract.
Creating OFTV1 Smart Contract
In this section, you will use the LayerZero Solidity Example library to bootstrap your cross-chain token smart contract. let's create our cross-chain token smart contracts in the following steps:
Step 1: Select the contracts folder in the Explorer pane and click the New File button and create a new file named crosschain-tokens.sol
Step 2: Open the file and add the following code to it:
// SPDX-License-Identifier: Unlicensedpragma solidity ^0.8.0;/* // https://layerzero.gitbook.io/docs/technical-reference/testnet/testnet-addresses Klaytn Baobab lzEndpointAddress = 0x6aB5Ae6822647046626e83ee6dB8187151E1d5ab chainId: 10150 deploymentAddress = Mumbai lzEndpointAddress = 0xf69186dfBa60DdB133E91E9A4B5673624293d8F8 chainId: 10109 deploymentAddress =*/import "@openzeppelin/contracts/token/ERC20/ERC20.sol";import "@layerzerolabs/solidity-examples/contracts/token/oft/v1/OFTCore.sol";import "@layerzerolabs/solidity-examples/contracts/token/oft/v1/interfaces/IOFT.sol";contract CrossChainToken is OFTCore, ERC20, IOFT { constructor(address _lzEndpointAddress) ERC20("CrossChainTokens", "CCT") OFTCore(_lzEndpointAddress) Ownable(msg.sender) { if (block.chainid == 1001) { // Only mint initial supply on Baobab _mint(msg.sender, 1_000_000 * 10 ** decimals()); } } function supportsInterface(bytes4 interfaceId) public view virtual override(OFTCore, IERC165) returns (bool) { return interfaceId == type(IOFT).interfaceId || interfaceId == type(IERC20).interfaceId || super.supportsInterface(interfaceId); } function token() public view virtual override returns (address) { return address(this); } function circulatingSupply() public view virtual override returns (uint) { return totalSupply(); } function _debitFrom(address _from, uint16, bytes memory, uint _amount) internal virtual override returns(uint) { address spender = _msgSender(); if (_from != spender) _spendAllowance(_from, spender, _amount); _burn(_from, _amount); return _amount; } function _creditTo(uint16, address _toAddress, uint _amount) internal virtual override returns(uint) { _mint(_toAddress, _amount); return _amount; }}
Code Walkthrough
This is your cross chain smart contract. On line 2 you tell Hardhat to use the Solidity version 0.8.0 or greater. Other than that, ERC20.sol, Layerzero’s OFTV1 contract was imported. From lines 18-22, you are creating your own smart contract that inherits ERC20, OFTCore contract. You do this by calling the constructor of ERC20 and pass the token name and symbol. Also you will pass the layerzero endpoint address of each chain into OFTCore contract.
As you can see in the code above, the token name and symbol have been set to CrosschainTokens and CCT respectively. You can change the token name and symbol to anything you desire.
The major function that brings the cross-chain functionality to live is the sendFrom function which resides in the OFTCore.sol contract. However, let's do a code walkthrough of function in the order of execution for this tutorial:
-
setTrustedRemoteAddress(): A trusted remote is another contract it will accept messages from. Having said that, In order to send and receive messages from known contracts, you need to securely pair them to one another's chain id and address by executing the setTrustedRemoteAddress() function. For more information about setting up trusted remotes, see Set Trusted Remotes.
-
approve(): The owner of the Omnichain Fungible Tokens needs to approve the crosschain-tokens.sol contract on the source chain in order to transfer tokens on its behalf across chains by calling the approve() function. For this tutorial, we will be approving 100 CCT tokens (100000000000000000000).
-
setMinDstGas(): Next is to set your minimum Gas Limit for each chain. This is done by calling setMinDstGas() function with the chainId of the other chain, the packet type ("0" meaning send), and the gas limit amount (200,000).
-
setUseCustomAdapterParams(): set this to true.
-
estimateFees(): This function helps get the quantity of native gas tokens to pay to transfer tokens to another chain. To achieve this, LayerZero makes use of an Oracle and Relayer service given the destination chainId, _toAddress, _amount, _useZro, and adapter parameters. For this tutorial, we will be using 10109 as the destination chainId, input your _toAddress, 10 CCT tokens as amount, false for _useZro, and
0x00010000000000000000000000000000000000000000000000000000000000030d40for the adapter parameters.You can check out Relayer Adapter Parameters on how to encode adapter parameters. To understand in detail how fees are estimated, see Estimating Message Fees. -
sendFrom(): This function sends the specified token amount to the destination chain. Note that this is a payable function; you have to send the estimated fee with the transaction. This function requires the following arguments:
- _from: the owner of token
- _destChainId: 10109
- _toAddress: insert the recipient address on the dest chain
- _amount: amount of tokens you want to send in Wei
- refundAddress: address to receive gas refunds
- _zroPaymentAddress: specify address zero (0x0000000000000000000000000000000000000000)
- _adapterParams: 0x00010000000000000000000000000000000000000000000000000000000000030d40
In the next section, we will be exploring the execution of functions in their appropriate order to achieve a successful cross-chain transfer of tokens.
Deploying the smart contract
In this section, you will make use of the script here to deploy the OFTV1 contract on Klaytn Baobab (source chain) and Polygon Mumbai (destination chain) respectively. Ensure you have tokens from a faucet for the respective network. You can acquire faucet tokens for the Klaytn Baobab here and Polygon Mumbai testnet here.
To deploy the contracts on the respective chains, run the command below:
- deploys on baobab (source chain)
npx hardhat run scripts/deploy/src-contract.js --network baobab
- deploys on mumbai (destination chain)
npx hardhat run scripts/deploy/dest-contract.js --network mumbai
Now you should have the OFTV1 contract deployed on both Baobab and Mumbai. You can verify your deployment by pasting each chain’s contract address in their respective explorer: Klaytnscope and Polygonscan.
Setting Trusted remote
In this section, you will securely pair the deployed contracts to one another's chain id and address by executing the setTrustedRemoteAddress() function. For this, use this script to set each chain’s contract as trusted.
- sets on source chain To set the contract as trusted on src chain, you need to pass in the destination chain ID (10109) and destination contract address of crosschain-token.sol in the setTrustedRemoteAddress() function.
To see it in action, run the command below:
npx hardhat run scripts/set-remote-address/src.js --network baobab
- sets on destination chain To set the contract as trusted on the destination chain, you need to pass in the source chain ID (10150) and source contract address of crosschain-token.sol in the setTrustedRemoteAddress() function.
To see it in action, run the command below:
npx hardhat run scripts/set-remote-address/dest.js --network mumbai
Running Misc command
In this section you will collectively execute the approve(), setMinDstGas(), setUseCustomAdapterParams(), and estimateFee() function explained in the codeWalkthrough section using this script.
To execute this script, run the command below:
npx hardhat run scripts/misc.js --network baobab
Executing the sendFrom functionality
To send tokens from one chain to another using the LayerZero OFTV1, you need to execute this script and pass the appropriate parameters as explained in the code Walkthrough section above.
To see this in action, run the command below:
npx hardhat run scripts/send-from.js --network baobab
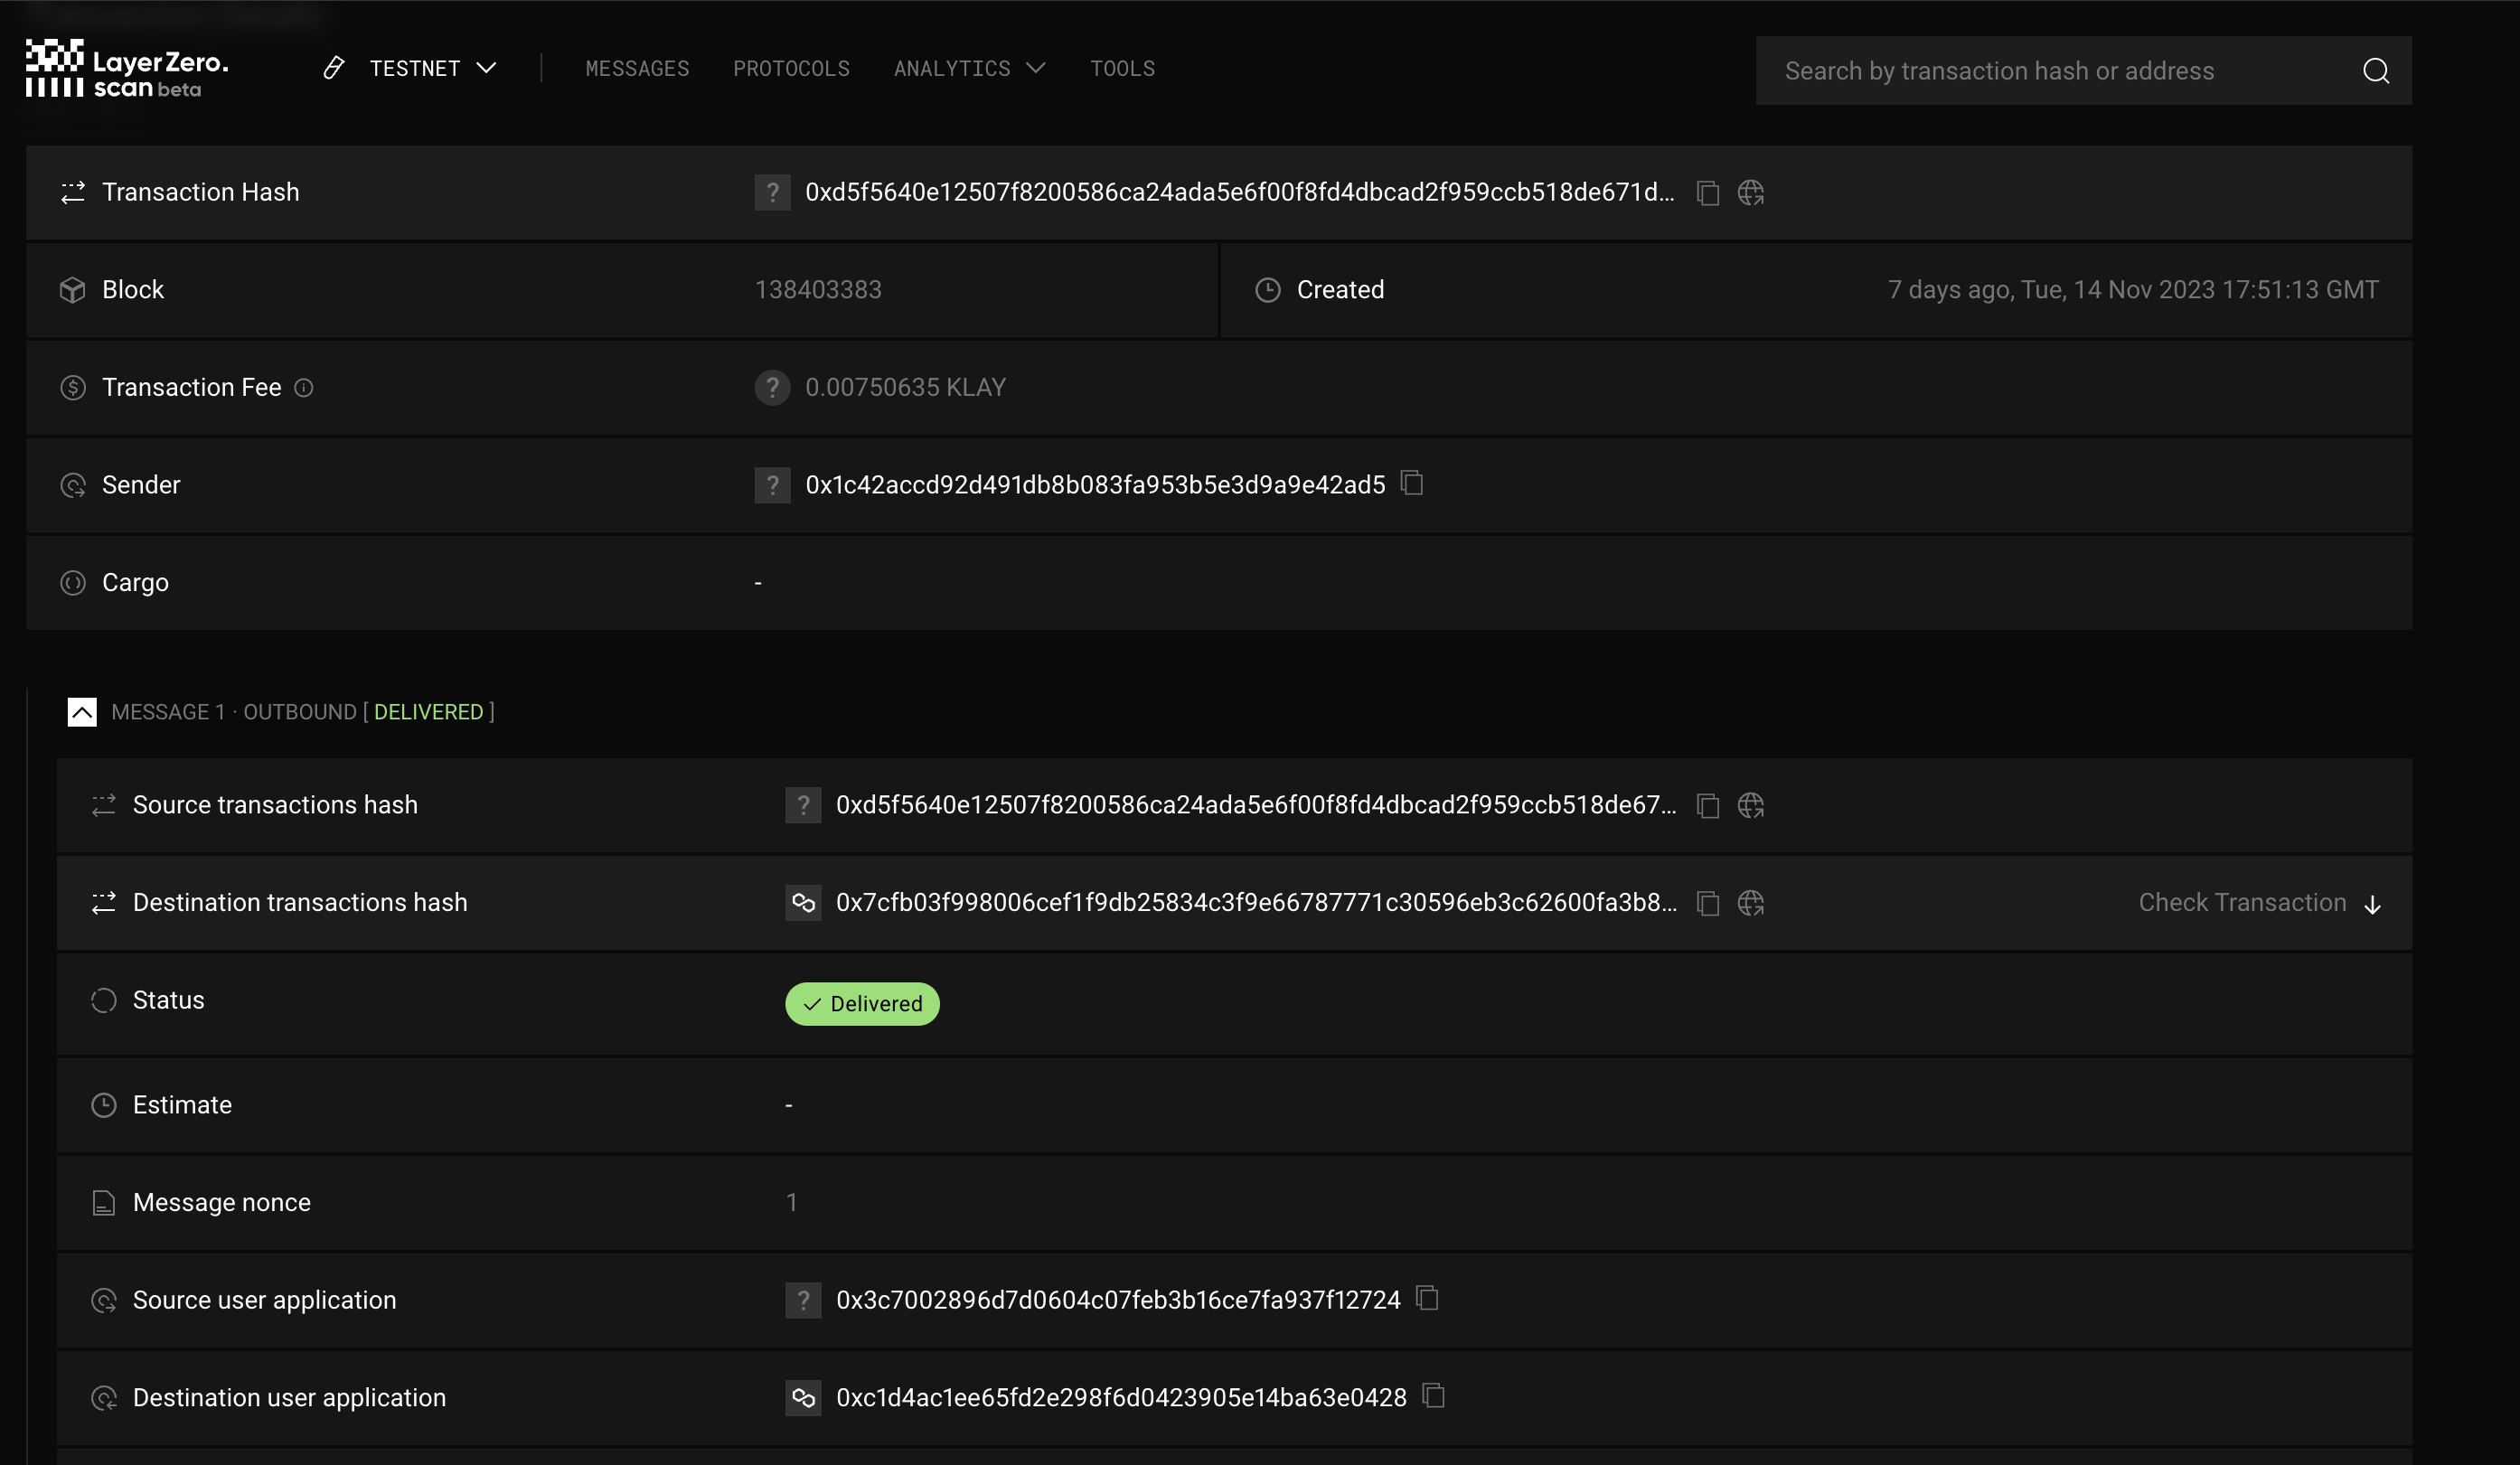
You can verify the cross-chain transaction by pasting the transaction hash in LayerZero Scan.

Also you can check the balance of the recipient address on the destination chain by executing this script.
To see it in action, run the command below:
npx hardhat run scripts/check-balance.js --network mumbai

Conclusion
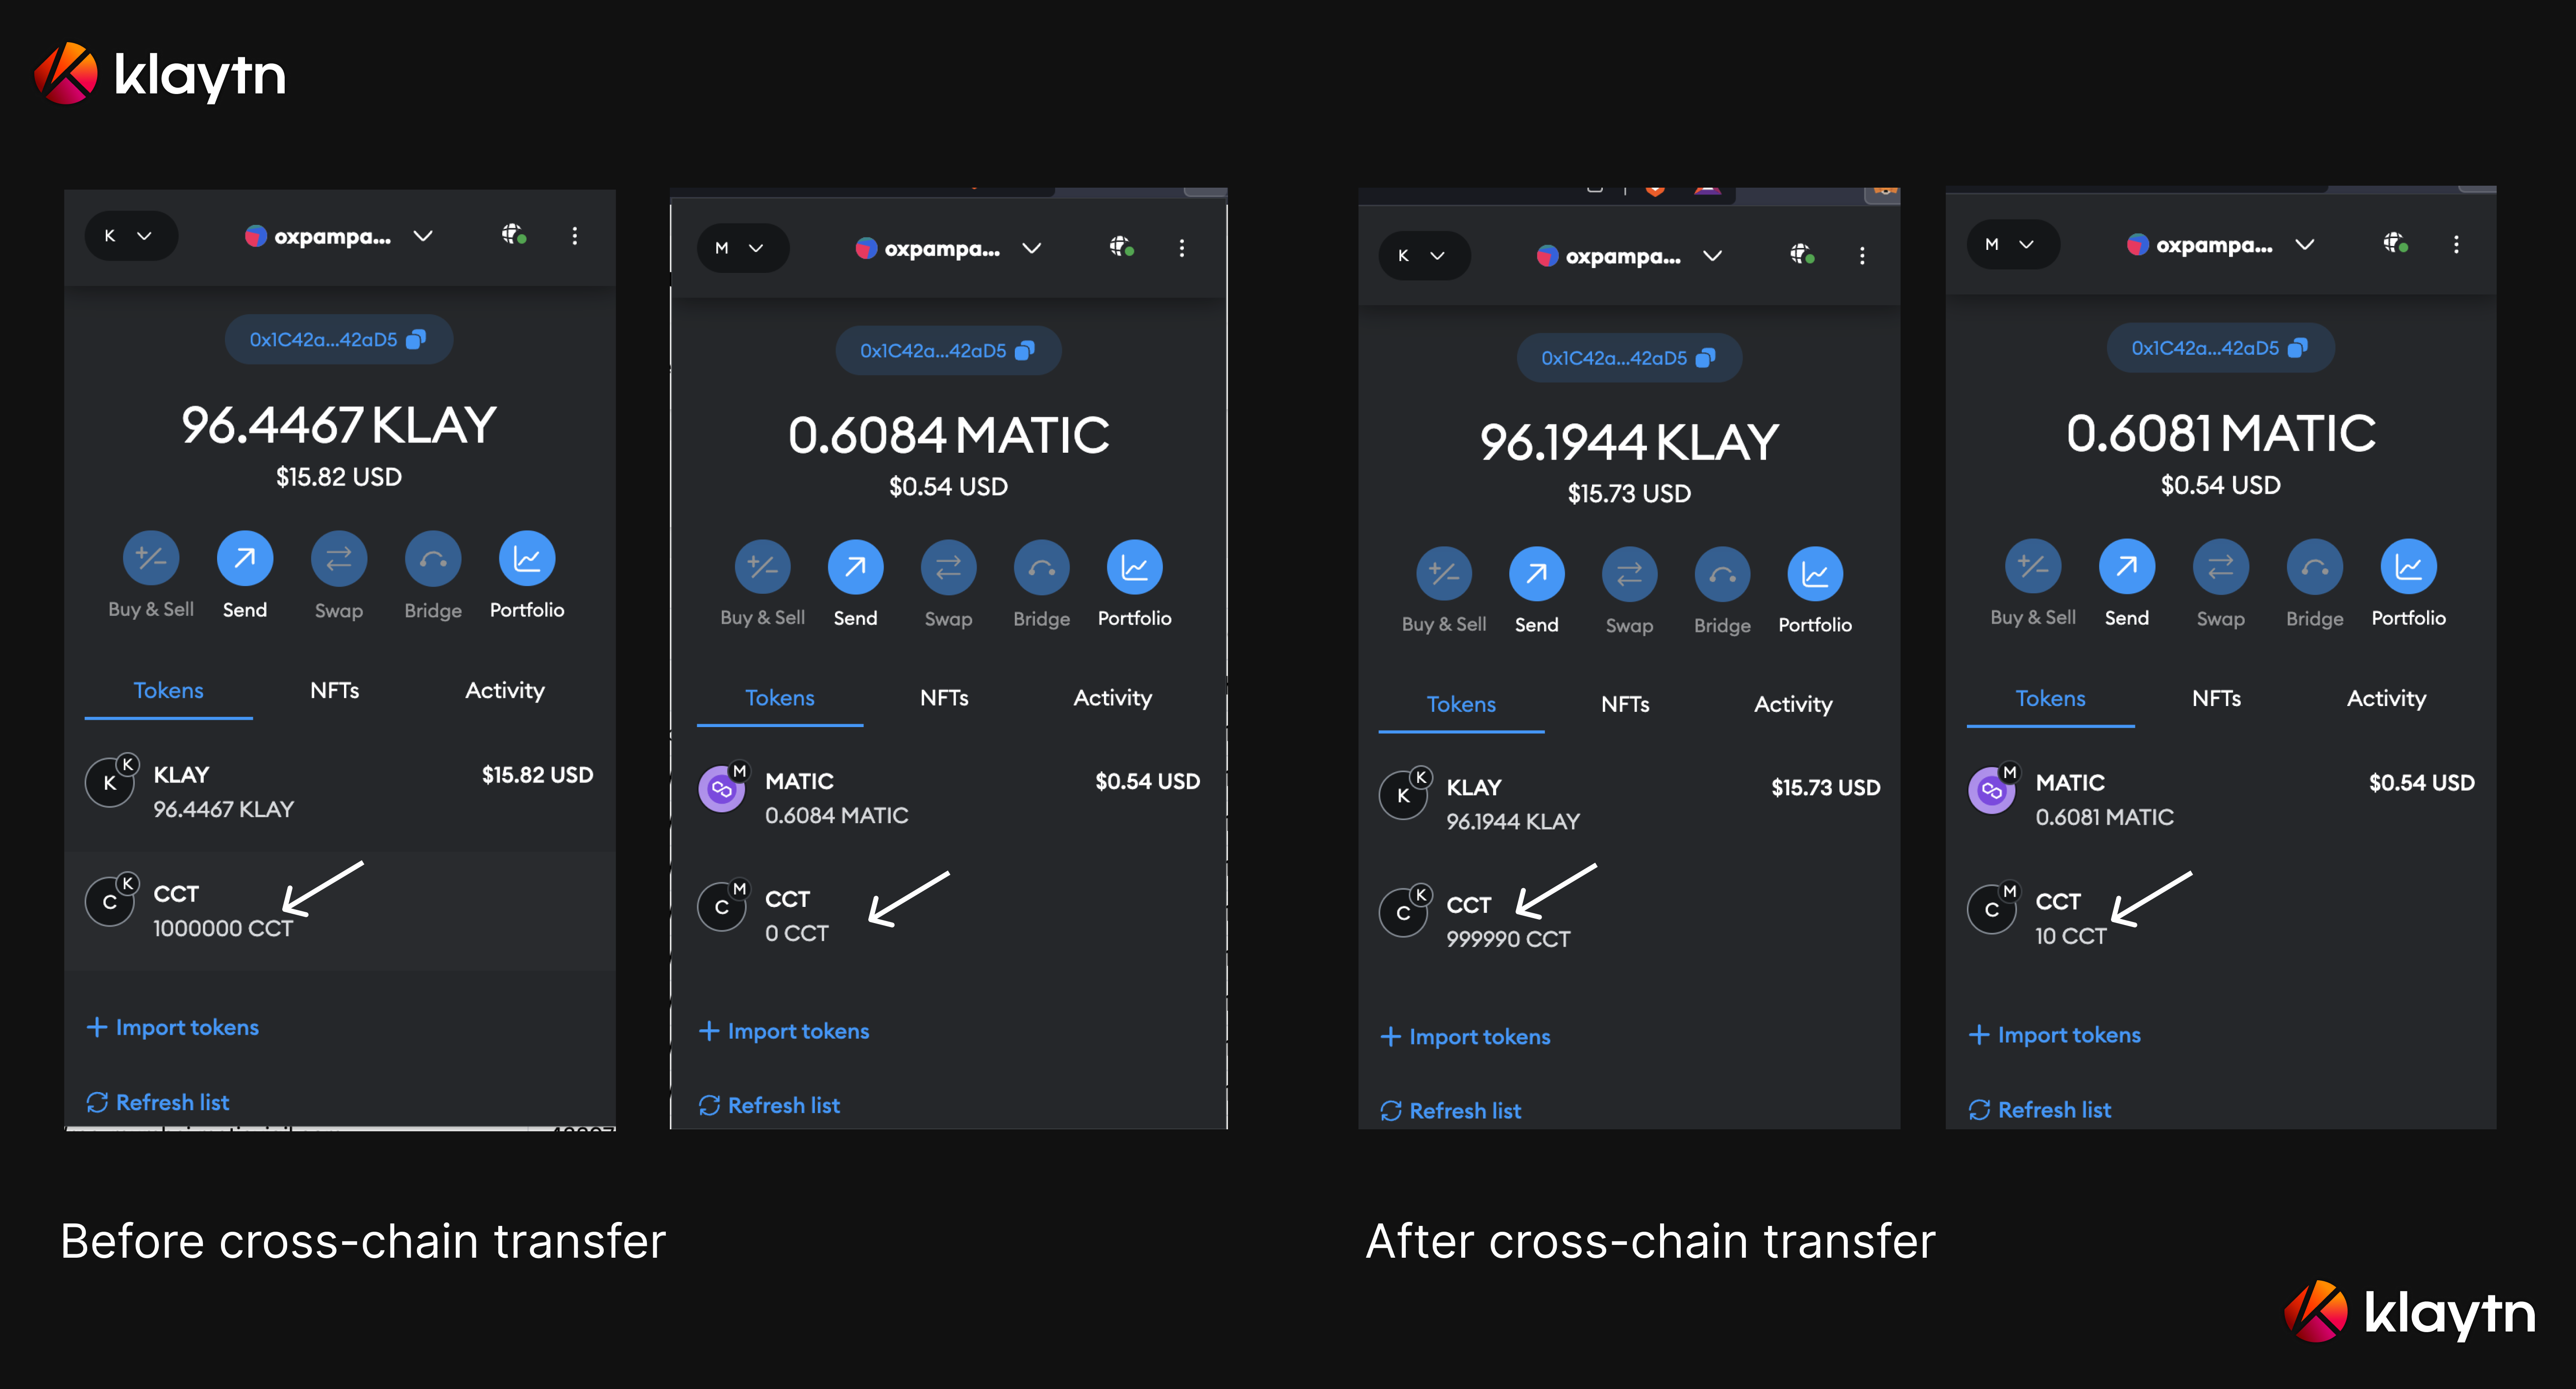
Congratulations! 🥳 You were able to successfully send tokens from Klaytn Baobab to Polygon Mumbai in a single transaction call using the LayerZero Omnichain Contract OFTV1. You can take it a step further by setting up a simple user interface to make it easy for users to move tokens between chains. Once token contracts are set up, you can use a web3 library such as web3klaytn or ethers.js to connect the sendFrom() function to a user interface.
Start building with crosschain-oftv1-example to bootstrap your own projects such as cross-chain decentralized exchanges, cross-chain lending, etc. For more in-depth guides on LayerZero, please refer to the LayerZero Docs and LayerZero Github Repository.