Deploy smart contracts
1. Clone Count DApp
1) Clone Count DApp repository
$ git clone https://github.com/klaytn/countbapp
2) Install & Run Count DApp
The package you just cloned is ready to launch without any modification.
The sample contract is already deployed to the Baobab testnet, and the contract ABI is included in our package.
Count DApp frontend code is initially configured to connect to the smart contract on the Baobab testnet.
If you want to run the app right away and see how it works, type below.
We HIGHLY recommend you follow the test environment mentioned on the first page.
$ npm install$ npm run local
⚠ Please check the file and directory permissions if it doesn't work. If you encounter 'Error: EACCES: permission denied', the command sudo chmod -R 755 /yourProjectDirectoryName could be helpful for you.
Application will pop up right away!
2. Write Smart Contract
- Background
- Define the variable
- Define functions
- Let's do something more
4.1. Add a variable
4.2. Update functions
1) Background
We will make a super simple contract called "Count".
a. There would be just one storage variable called count.
b. Users can increase count variable by 1 or decrease it by 1. So there would be two functions, plus function which increases count variable by 1, and minus function which decreases count variable by 1. That's all!
2) Define the variable
Before setting a variable, we should specify the solidity version. Let's use 0.5.6 stable version.
solidity 0.5.6; // Specify solidity's version
Then we will name our contract "Count".
pragma solidity 0.5.6;contract Count { // set contract names to "Count"}
We need to declare the variable count as uint(unsigned integer) type, and initialize it to be 0.
pragma solidity 0.5.6;contract Count { uint public count = 0; // Declare count variable as uint type and initialize its value to 0.}
3) Define functions
We need two functions, plus and minus. Each function's role is:
plus - increase the count by 1. (count = count + 1)
minus - decrease the count by 1. (count = count - 1)
pragma solidity 0.5.6;contract Count { uint public count = 0; function plus() public { // Make a public function called 'plus' count = count + 1; // 'plus' function increases count variable by 1. } function minus() public { // Make a public function called 'plus' count = count - 1; // 'minus' function decreases count variable by 1. }}
NOTE
To allow the functions to be called outside the contract, functions should be declared as public.
function plus() public { … }
4) Let's do something more
We want to add one more feature. How about remembering the last participant's wallet address?
4-1) Add a variable
So we will have a variable, lastParticipant as address type:
address public lastParticipant;
pragma solidity 0.5.6;contract Count { uint public count = 0; address public lastParticipant; function plus() public { // Make a public function called 'plus' count = count + 1; // 'plus' function increases count variable by 1. } function minus() public { // Make a public function called 'plus' count = count - 1; // 'minus' function decreases count variable by 1. }}
4-2) Update functions
To track the last participant's address, we store the address to lastParticipant like the below:
pragma solidity 0.5.6;contract Count { uint public count = 0; address public lastParticipant; function plus() public { count = count + 1; lastParticipant = msg.sender; // store msg.sender to lastParticipant } function minus() public { count = count - 1; lastParticipant = msg.sender; // store msg.sender to lastParticipant }}
NOTE
1) public If you declare a variable or a function as public, you can access them outside the blockchain, i.e., you can access this variable or function from your frontend application. You will see how to interact with the contract public methods and variables from the frontend application in the Count componenent chapter.
2) msg.sender
msg.sender is the address that initiated the current transaction.
To get the address of the transaction sender we can use msg.sender variable.
lastParticipant = msg.sender;
This line will make the lastParticipant to have the msg.sender.
3. Deploy Contract
- truffle configuration
- Deploy setup
- Deploy
1) truffle configuration
truffle-config.js file describes how to deploy your contract code. You can configure below items in truffle-config.js
1) Who will deploy the contract (Which Klaytn account will deploy the contract)?
2) Which network will you deploy to?
3) How many gas are you willing to pay to deploy the contract?
There are 2 different methods to deploy your contract, first one uses private key, the other one uses unlocked account.
DEPLOY METHOD 1: By private key
WARNING: You shouldn't expose your private key. Otherwise, your account would be hacked.
If you want to deploy your contract using the private key, provider option is needed.
1) Pass your private key as the 1st argument of new HDWalletProvider().
2) Pass your Klaytn node's URL as the 2nd argument of new HDWalletProvider().
example)
{ ..., provider: new HDWalletProvider( 'YOUR PRIVATE KEY', 'https://public-en-baobab.klaytn.net', // If you're running full node you can set your node's rpc url. ), ...}
const HDWalletProvider = require("truffle-hdwallet-provider-klaytn");const NETWORK_ID = '1001'const GASLIMIT = '8500000'/** * We extracted `URL`, `PRIVATE_KEY` as const variable to set value easily. * Set your private key and klaytn node's URL in here. */const URL = `https://public-en-baobab.klaytn.net`const PRIVATE_KEY = '0x48f5a77dbf13b436ae0325ae91efd084430d2da1123a8c273d7df5009248f90c'module.exports = { networks: { /** * DEPLOY METHOD 1: By private key. * You shouldn't expose your private key. Otherwise, your account would be hacked!! */ baobab: { provider: () => new HDWalletProvider(PRIVATE_KEY, URL), network_id: NETWORK_ID, gas: GASLIMIT, gasPrice: null, }, },}
See networks property in the above code. It has baobab key which has 4 properties, provider, network_id, gas, gasPrice.
provider: new HDWalletProvider(PRIVATE_KEY, URL) line informs the contract deployer account and the target network node URL.
network_id: NETWORK_ID line specifies the network id in Klaytn. Use 1001 for the Baobab network (testnet).
gas: GASLIMIT line informs how much gas limit will you endure to deploy your contract.
gasPrice: null line informs truffle how much price will you pay per gas unit. Currently in Klaytn, the price is fixed to 25000000000. If you set it to null, truffle will set the value with the fixed gas price automatically.
DEPLOY METHOD 2: By unlocked account (difficult)
To deploy a contract by unlocked account, you should have your Klaytn full node.
Access your Klaytn node console by typing $ klay attach http://localhost:8551 If you don't have a Klaytn account in the node, generate it by typing personal.newAccount() on the console.
If you already have one, unlock your account through personal.unlockAccount().
After ensuring account is unlocked,
you should set the properties, host, port, network_id, and from. 1) Which network to deploy (host, port, network_id)
2) Who will deploy (from) 3) How much gas will you endure to deploy your contract (gas)
Put your unlocked account address on from. If you're running your own Klaytn full node, set the node's host to host and node's port to port.
example)
{ host: 'localhost', port: 8551, from: '0xd0122fc8df283027b6285cc889f5aa624eac1d23', network_id: NETWORK_ID, gas: GASLIMIT, gasPrice: null,}
2) Deploy setup (Which contract do you want to deploy?)
migrations/2_deploy_contracts.js:
const Count = artifacts.require('./Count.sol')const fs = require('fs')module.exports = function (deployer) { deployer.deploy(Count) .then(() => { // Record recently deployed contract address to 'deployedAddress' file. if (Count._json) { // Save abi file to deployedABI. fs.writeFile( 'deployedABI', JSON.stringify(Count._json.abi, 2), (err) => { if (err) throw err console.log(`The abi of ${Count._json.contractName} is recorded on deployedABI file`) }) } fs.writeFile( 'deployedAddress', Count.address, (err) => { if (err) throw err console.log(`The deployed contract address * ${Count.address} * is recorded on deployedAddress file`) }) })}
You can specify which contract code will you deploy in your contracts/ directory.
First, you should import your contract file (Count.sol) in this file through const Count = artifacts.require('./Count.sol')
And use deployer to deploy your contract, through deployer.deploy(Count).
If you want to run some logic after deploying your contract, use .then().
We want to store the contract ABI and the deployed address in files. fs node.js module is used to do it. (fs.writeFile(filename, content, callback))
Through this post-process, we save our contract address and ABI as deployedABI and deployedAddress in the directory.
For further information about artifacts., visit truffle document site.
3) Deploy
You need KLAY to deploy a contract. You can receive testnet KLAY on faucet.
- On Klaytn wallet https://baobab.wallet.klaytn.foundation/faucet, there is a faucet providing 150 KLAY per 86400 blocks in Klaytn Baobab testnet. After creating your Klaytn account, run faucet to receive 150 KLAY.

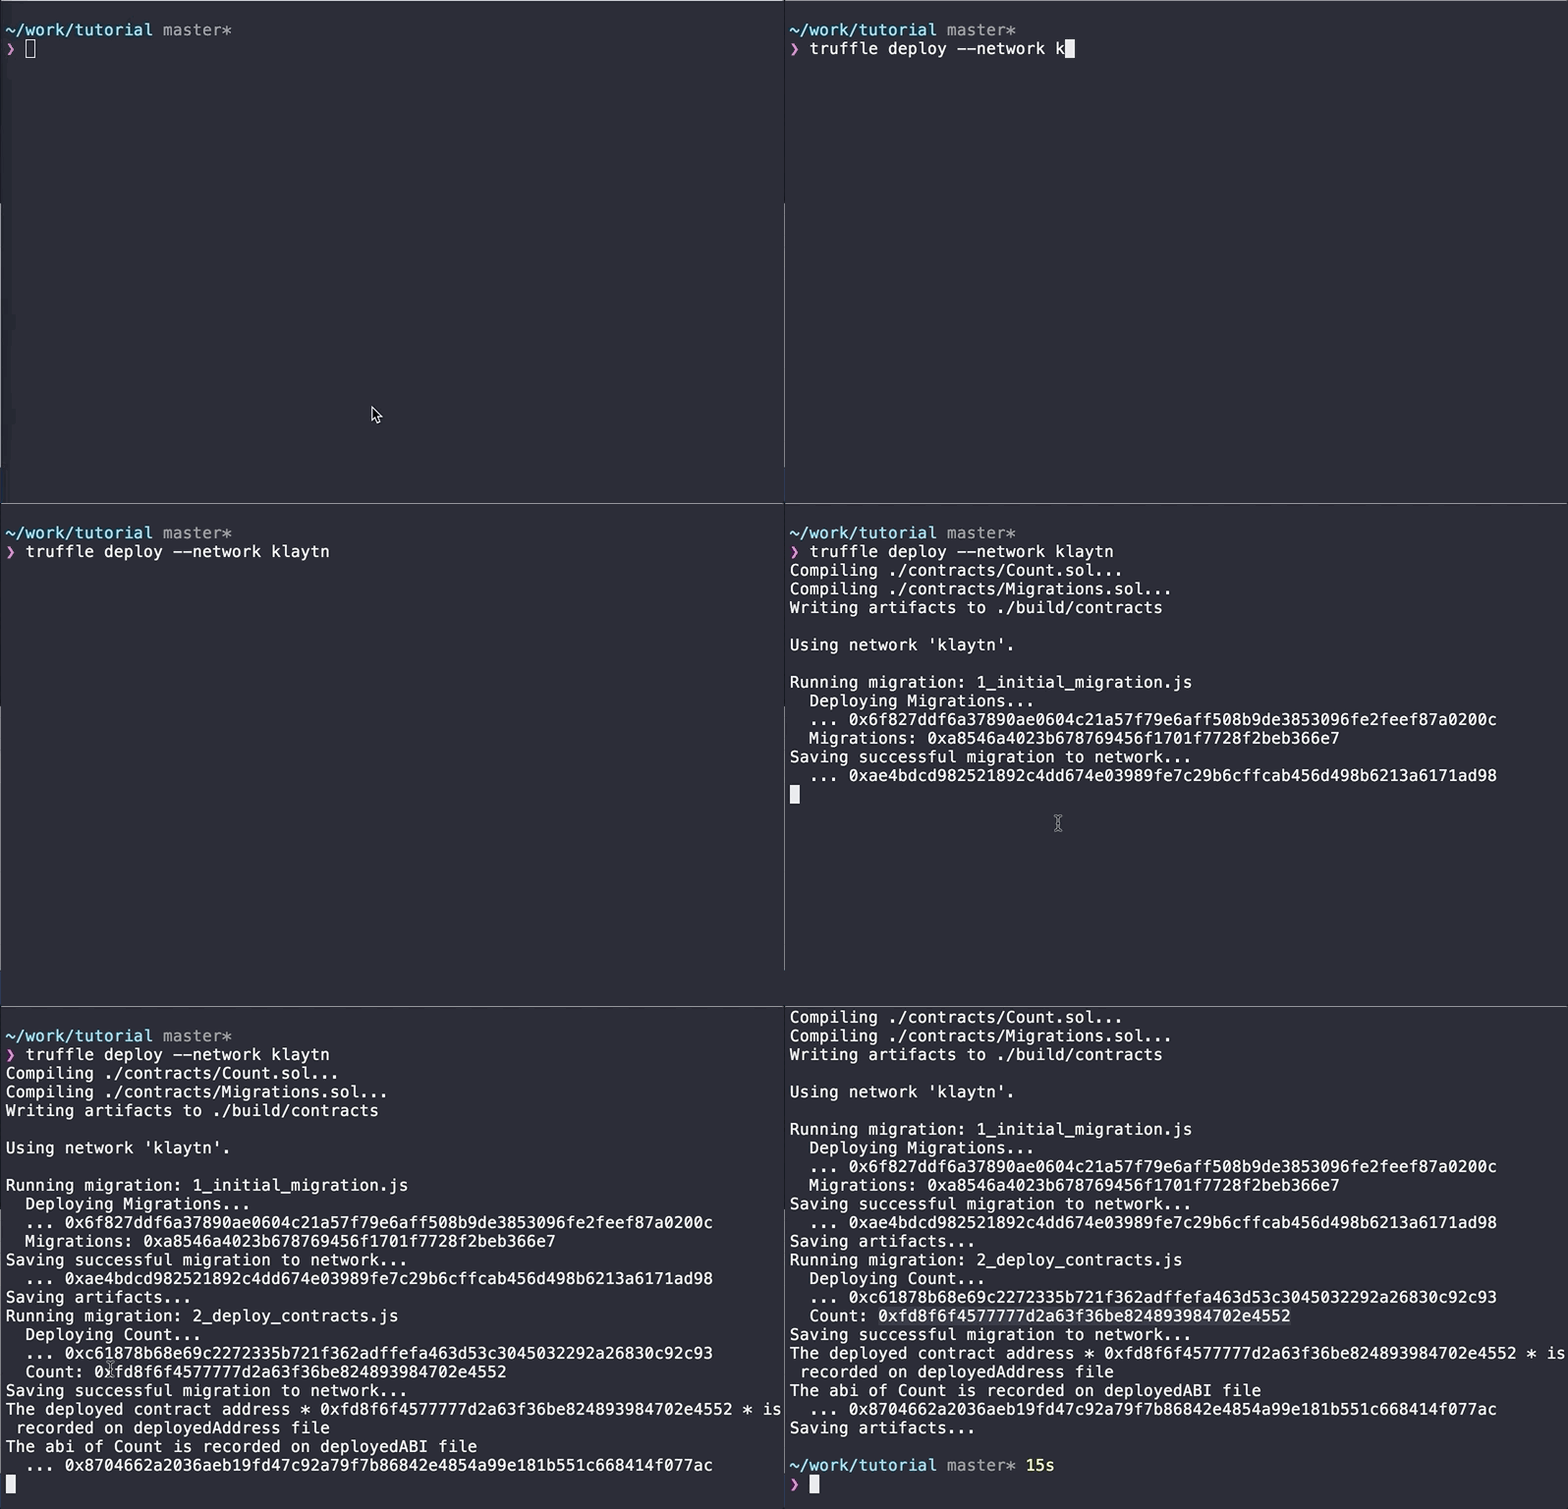
Type $ truffle deploy --network baobab.
It will deploy your contract according to the configurations defined in truffle-config.js and migrations/2_deploy_contracts.js.
cf) --reset option
After deploying your contract, if you type $ truffle deploy --network baobab again, nothing will happen.
Because truffle deploys a contract only when there are changes in the contract, otherwise truffle will not do anything.
If you want to re-deploy your contract anyway, there is an option --reset.
If you provide this option, truffle will deploy your contract even the content of contract hasn't changed.
ex) $ truffle deploy --reset --network baobab
To recap,
truffle-config.jsconfigures thetarget network,deployer account, and thegas limit.migrations/2_deploy_contracts.jsconfigures thecontractto deploy.target network: We deploy our contract to the nodehttps://public-en-baobab.klaytn.net.deployer account: '0xd0122fc8df283027b6285cc889f5aa624eac1d23' will deploy this contract.gas limit: We can endure up to '20000000' gas for deploying our contract.contract: We will deploy the Count contract.
From the terminal output, you can see if the deployment has been succeeded and find the deployed address.
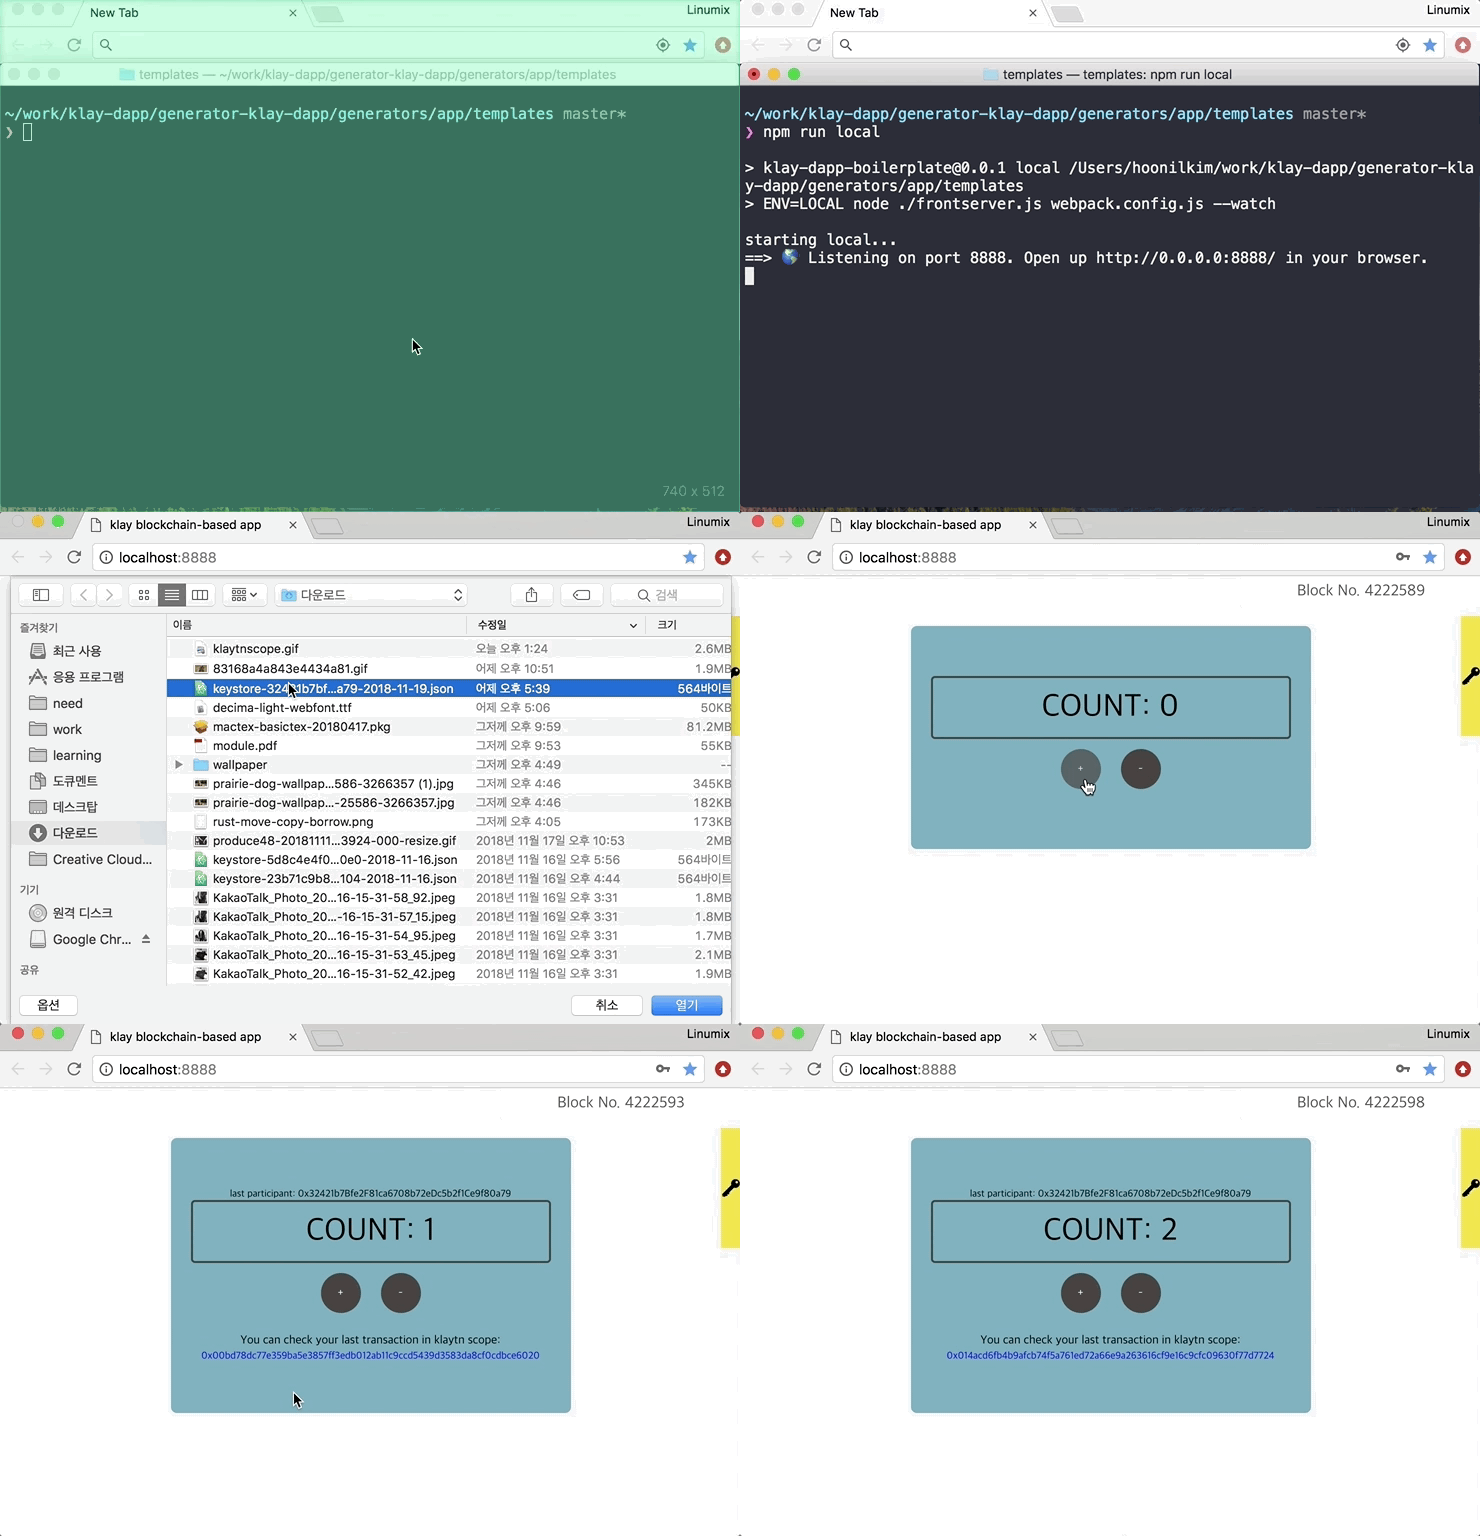
4. Run App

Run our app in browser.
type $ npm run local